Tag: gce
Libcloud 0.14 and Google Cloud Platform
This is a guest post by Rick Wright. Rick is an engineer at Google and the main contributor to the Libcloud Google Compute Engine driver.
As anyone following this blog knows, Libcloud 0.14 was recently released. Included in this release is new support for the Google Compute Engine service that was recently made generally available.
The first Libcloud driver for Google Compute Engine was initially released last summer, and has been continually updated to support new Compute Engine features. Support for the Compute Engine Load Balancer was also recently added.
Libcloud had previously added support for Google Cloud Storage through the S3 compatibility API.
In this post, we’ll show you how to get up and running with Google Compute Engine with Libcloud, show you how to create some instances (nodes) and point you to additional resources. We also show you how you can start up 20 instances in under a minute.

Getting Started
If you haven’t yet signed up for Google Compute Engine, more information can be found on the Google Cloud Platform site. We hope that you will look at the Google Cloud Platform and consider Compute Engine for workloads of any size.
If you are familiar with Libcloud, using the driver for Compute Engine will also be familiar to you as nearly all of the standard Libcloud API methods for Compute and Load Balancing are supported by the Compute Engine drivers.
Setting up Authentication
Google Compute Engine uses OAuth2 for authentication and Libcloud supports two different authentication methods for Compute Engine: Service Accounts and Installed Applications. More information can be found about these options in the driver documentation, but here is a simple walk-through for getting your Service Account credentials (note that the Service Account authentication requires the PyCrypto library):
From the Console (https://cloud.google.com/console), select your project. When your project is open, select “APIs & auth” and then “Credentials” as shown below:
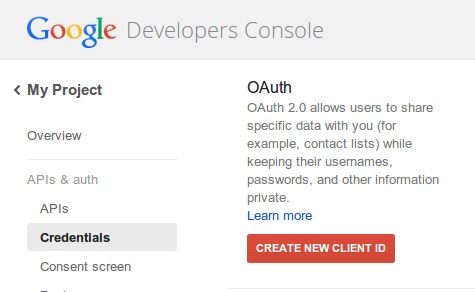
To create a new Service Account ID, click on “Create New Client ID”
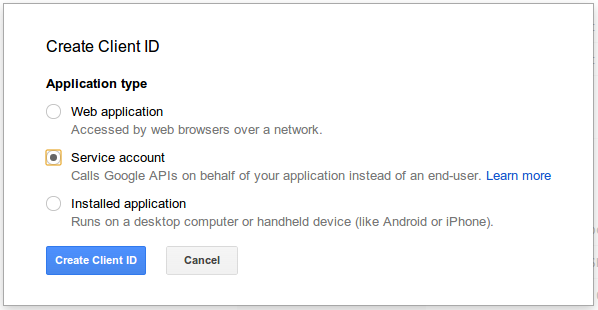
Select “Service account” and click “Create Client ID”
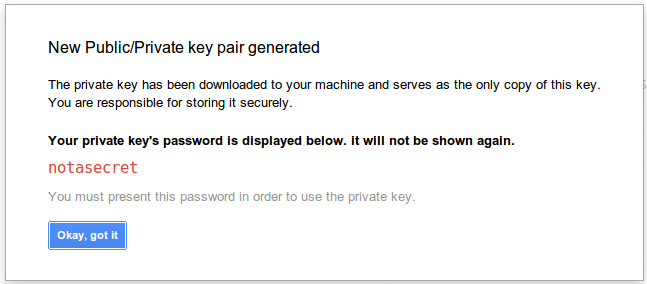
This will create and download a PCKS-12 private key to your local machine. You will need to convert this to a .pem format key. (See additional instructions in the driver documentation).
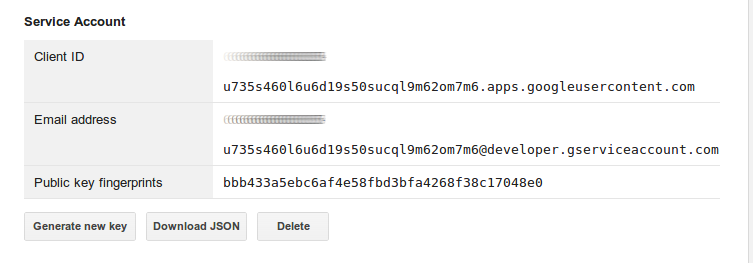
To connect to Compute Engine from Libclould, you will need to provide both the “Email address” for the service account and the path to the key file.
Creating an Instance
The Compute Engine driver supports the normal Libcloud ways of doing things. For example, to create the driver you would do something like this:
from libcloud.compute.types import Provider
from libcloud.compute.providers import get_driver
Driver = get_driver(Provider.GCE)
gce = Driver('your_service_account_email', 'path_to_pem_file',
             datacenter='us-central1-a',
             project='your_project_id')
Then, you may want to get a list of machine sizes or images to use for your node creation:
sizes = gce.list_sizes()
images = gce.list_images()
and then filter them to find the correct size/image object to create your node. For example:
size_obj = [s for s in sizes if s.id == 'n1-standard-1'][0]
image_obj = [i for i in images if i.name == 'debian-7'][0]
Finally, you would create the node using the create_node() method:
new_node = gce.create_node(name='my_node', size=size_obj,
                           image=img_obj)
The GCE driver also supports the ability to pass in size/image by name instead of by object, so you could create your new node like this, without looking up the sizes/images:
new_node = gce.create_node(name='my_node', size='n1-standard-1',
                           image='debian-7')
In this case a new node will be created using the “n1-standard-1” machine type and will use the latest “debian-7” image that is available.
Creating Multiple Instances
We have added an extra method to the Compute Engine driver to help in the creation of multiple instances/nodes in parallel. This is the “ex_create_multiple_nodes()” method, and it can be used like this:
base_name = 'multiple-nodes'
number = 20
start_time = time.time()
multi_nodes = gce.ex_create_multiple_nodes(
    base_name, 'n1-standard-1', 'debian-7', number)
end_time = time.time()

print('Created the following %s nodes in %.2f seconds' % (
   number, end_time-start_time))

for node in multi_nodes:
   print('   %s' % node.name)
Running this gives the following output (timing will likely vary somewhat):
Created the following 20 nodes in 35.77 seconds
  multiple-nodes-000
  multiple-nodes-001
  multiple-nodes-002
  multiple-nodes-003
  multiple-nodes-004
  ...
Onward
This post showed you how to get started, and additional example code can be found in the Libcloud Compute Engine demo code. The demo code can show you how to use most of the features of the driver, including: Creating disks, firewalls and addresses; setting tags; attaching and detaching disks and deleting resources. There is separate demo code for the Load Balancer functions which shows how to quickly set up 3 web servers with a Load Balancer controlling the traffic to them. In addition, the driver documentation contains the documentation for the extra methods that cover nearly all of the features of the Compute Engine API.
We are excited to be able to contribute to the Libcloud project and hope that you will find it useful. We like working with Libcloud and have used it as the basis for contributing code to other open source projects such as Ansible and SaltStack. If you run into problems or find bugs, please report them (or send a pull request) and we will be happy to continue to fix and enhance the Compute Engine driver in Libcloud.